Ergonomic Mouse Prototype
Class: 24-672: DIY Design & Fabrication
Task: Redesign a common household object to have a more ergonomic handle.
I decided to redesign a computer mouse. I had been working with a Bluetooth mouse a lot at the time and it was incredibly small and uncomfortable. So I set out to create a larger, more comfortable mouse. I also wanted to incorporate sharp edges with smooth curves.
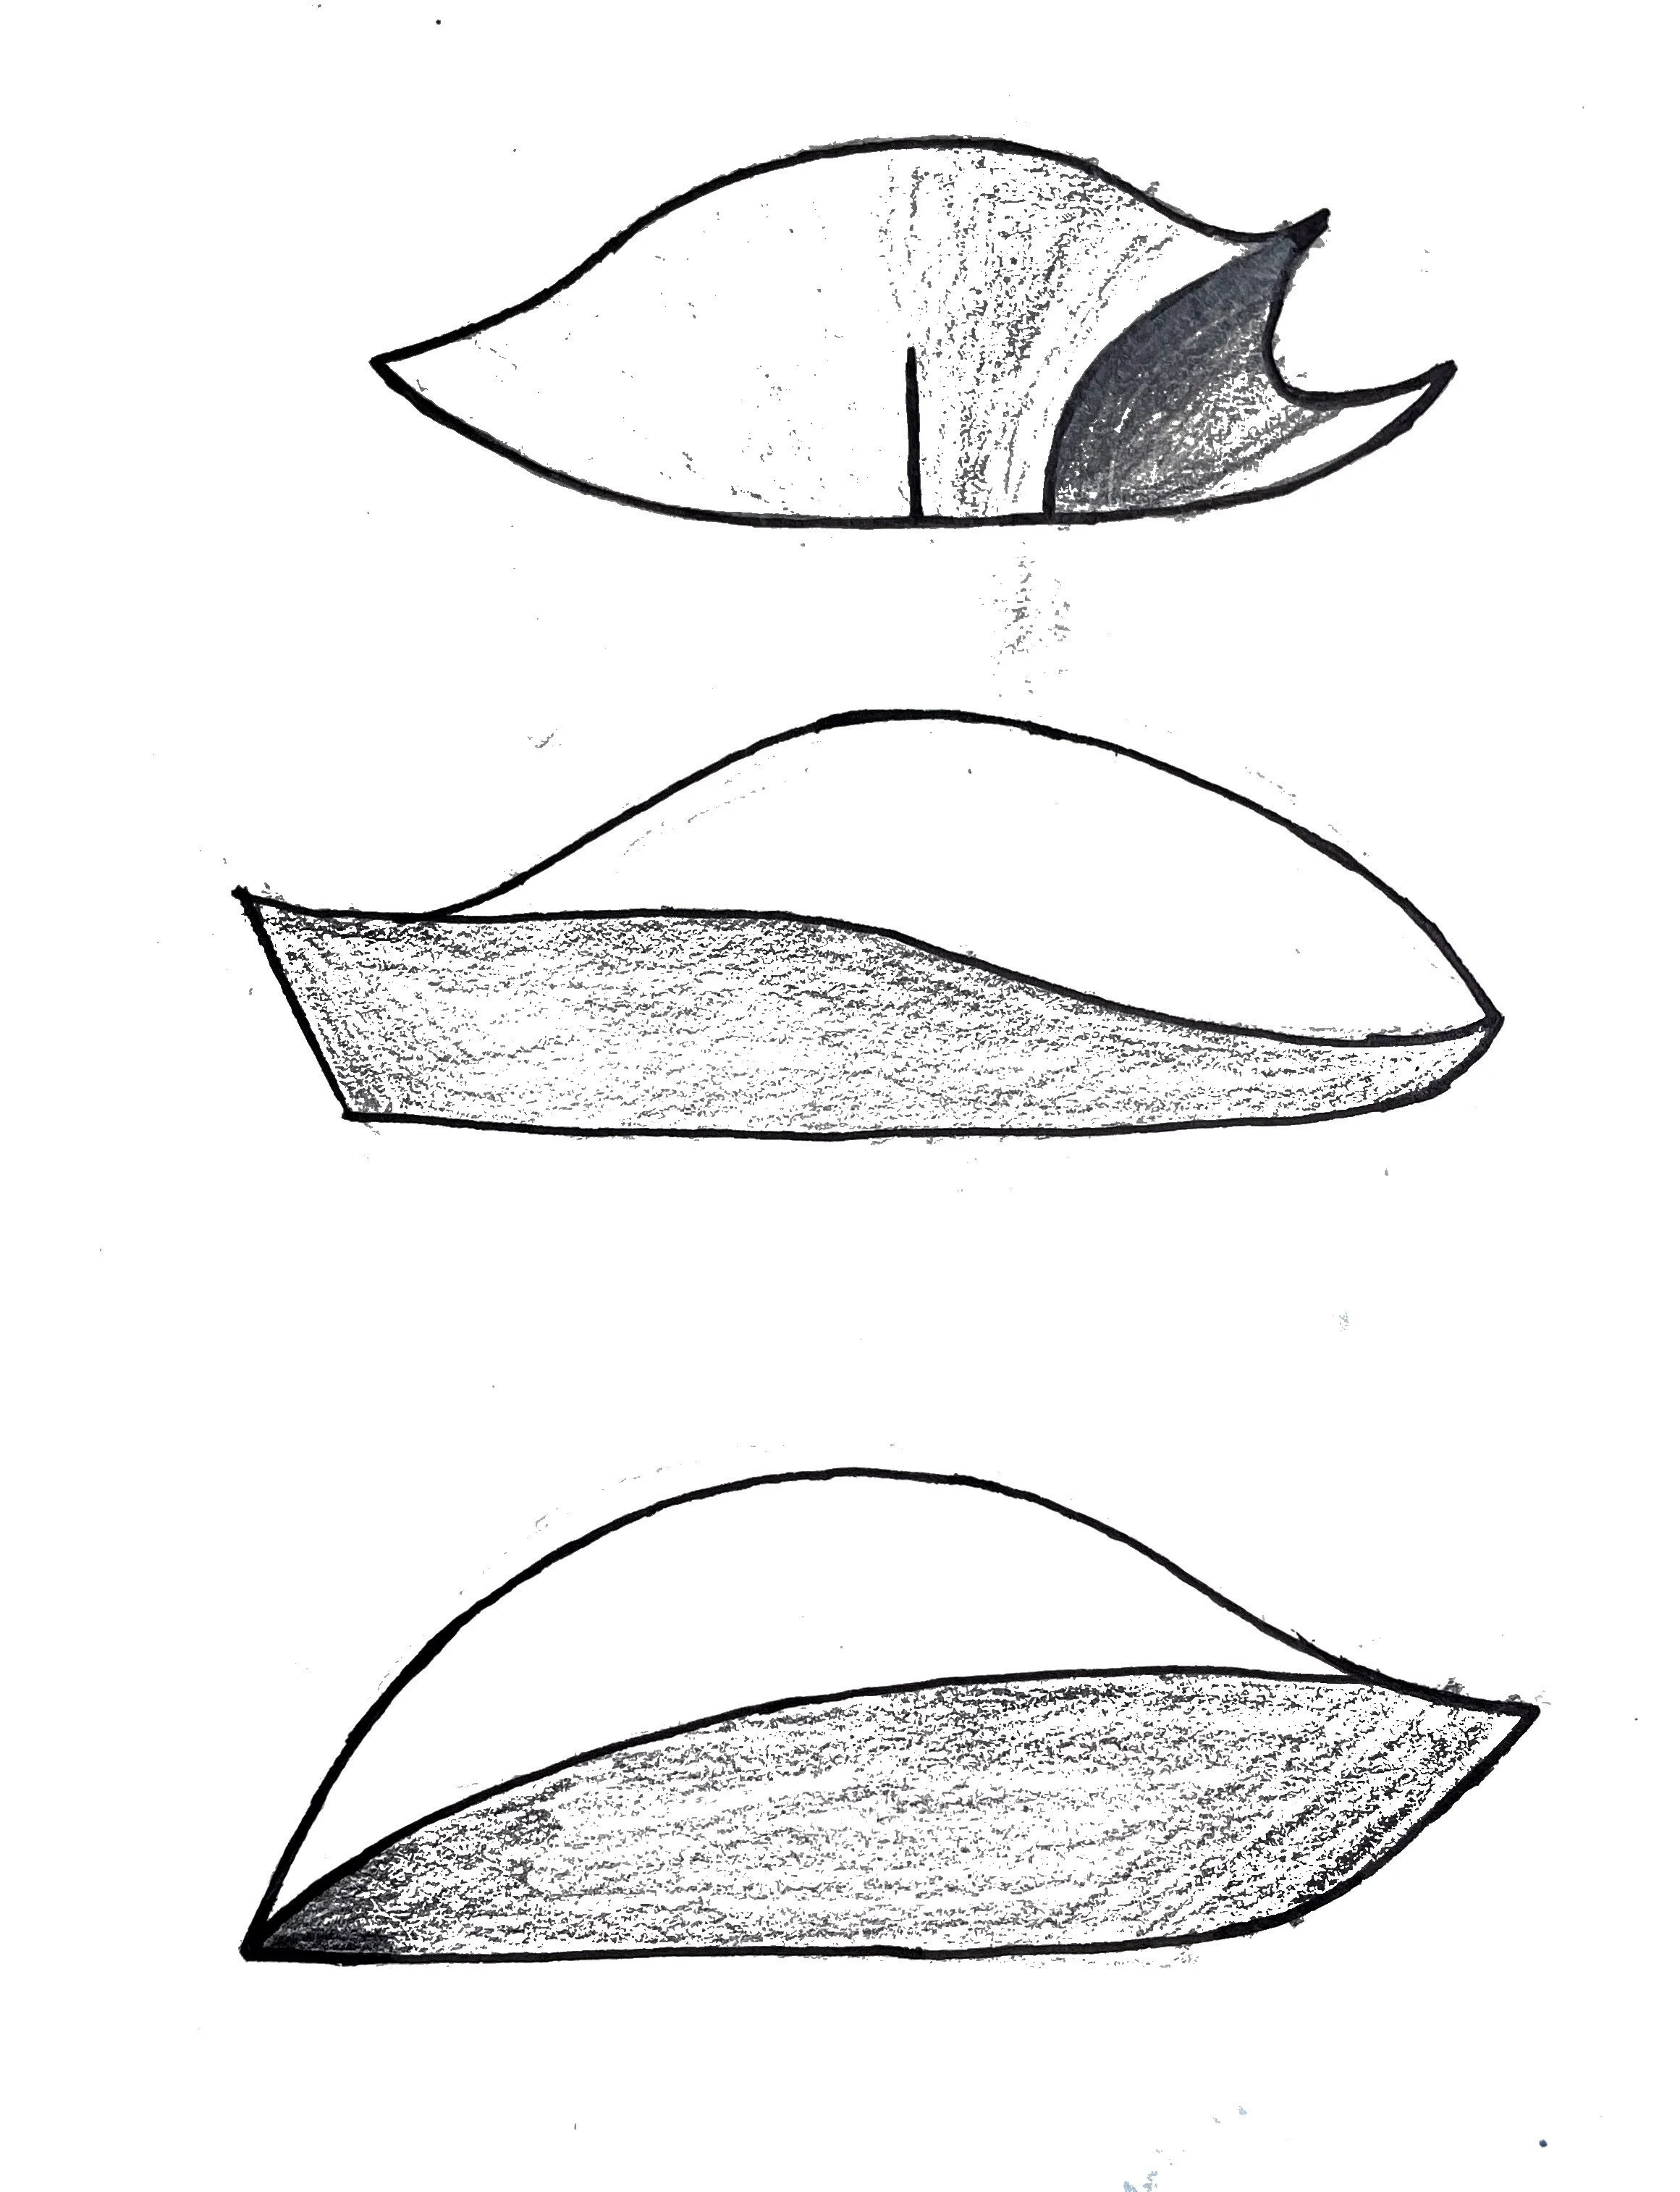
Here are some initial sketches of top views, side views, and front views.
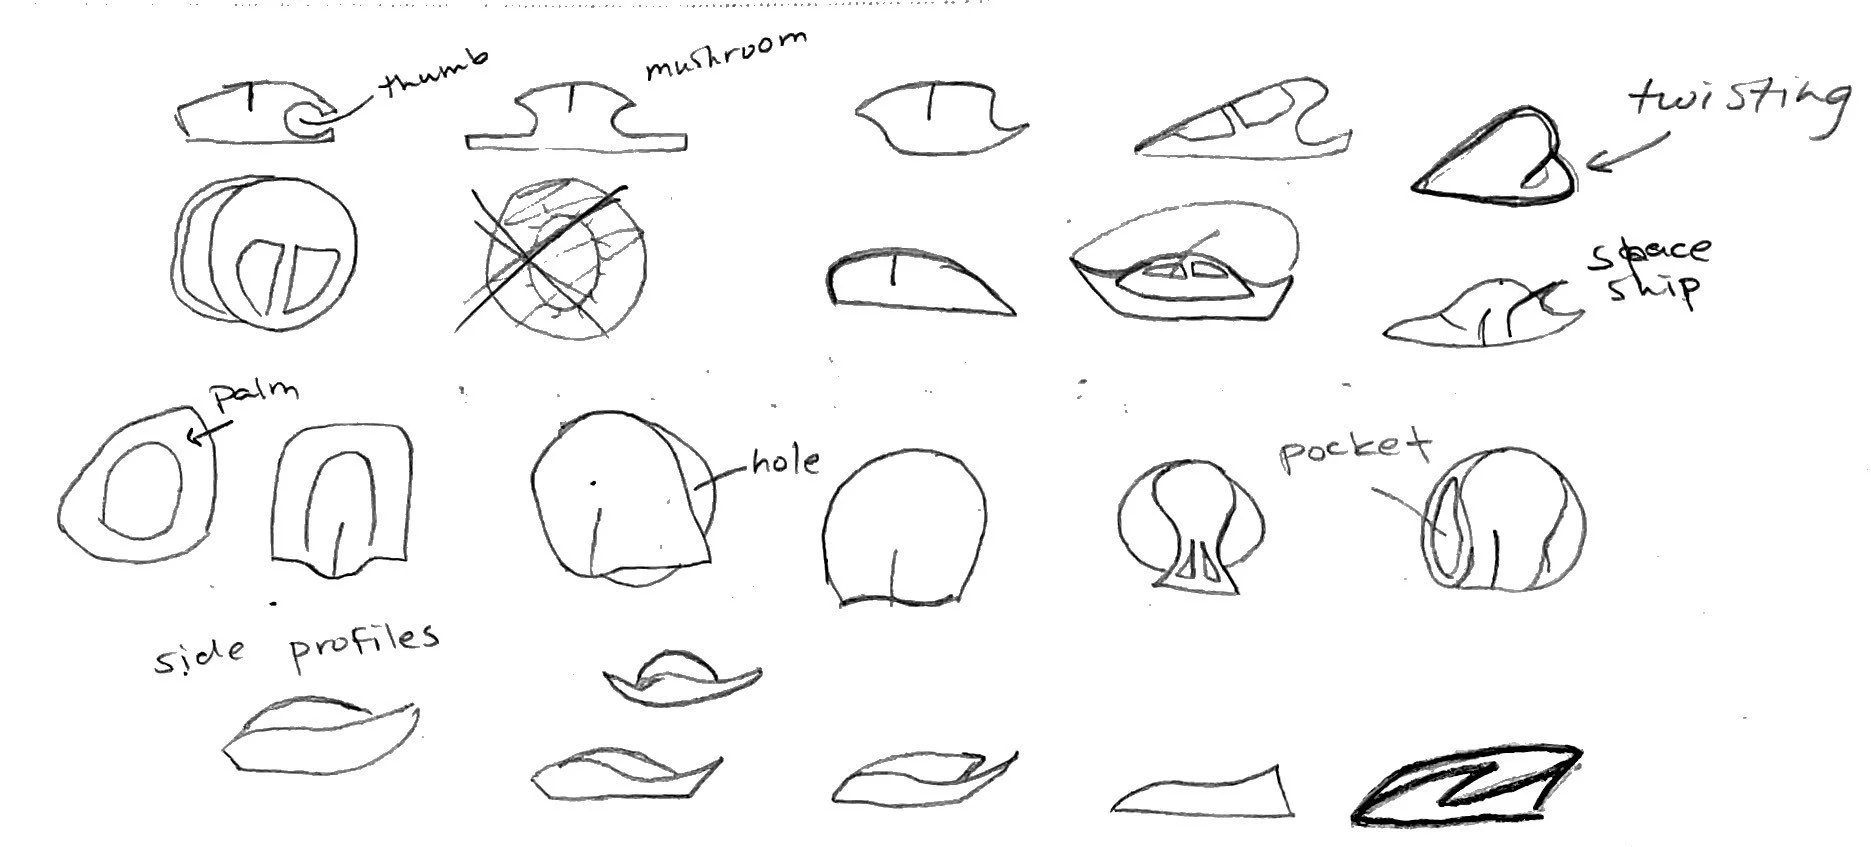
So I started by drawing some ideas by combining some of the ideas above. Here are some of those.
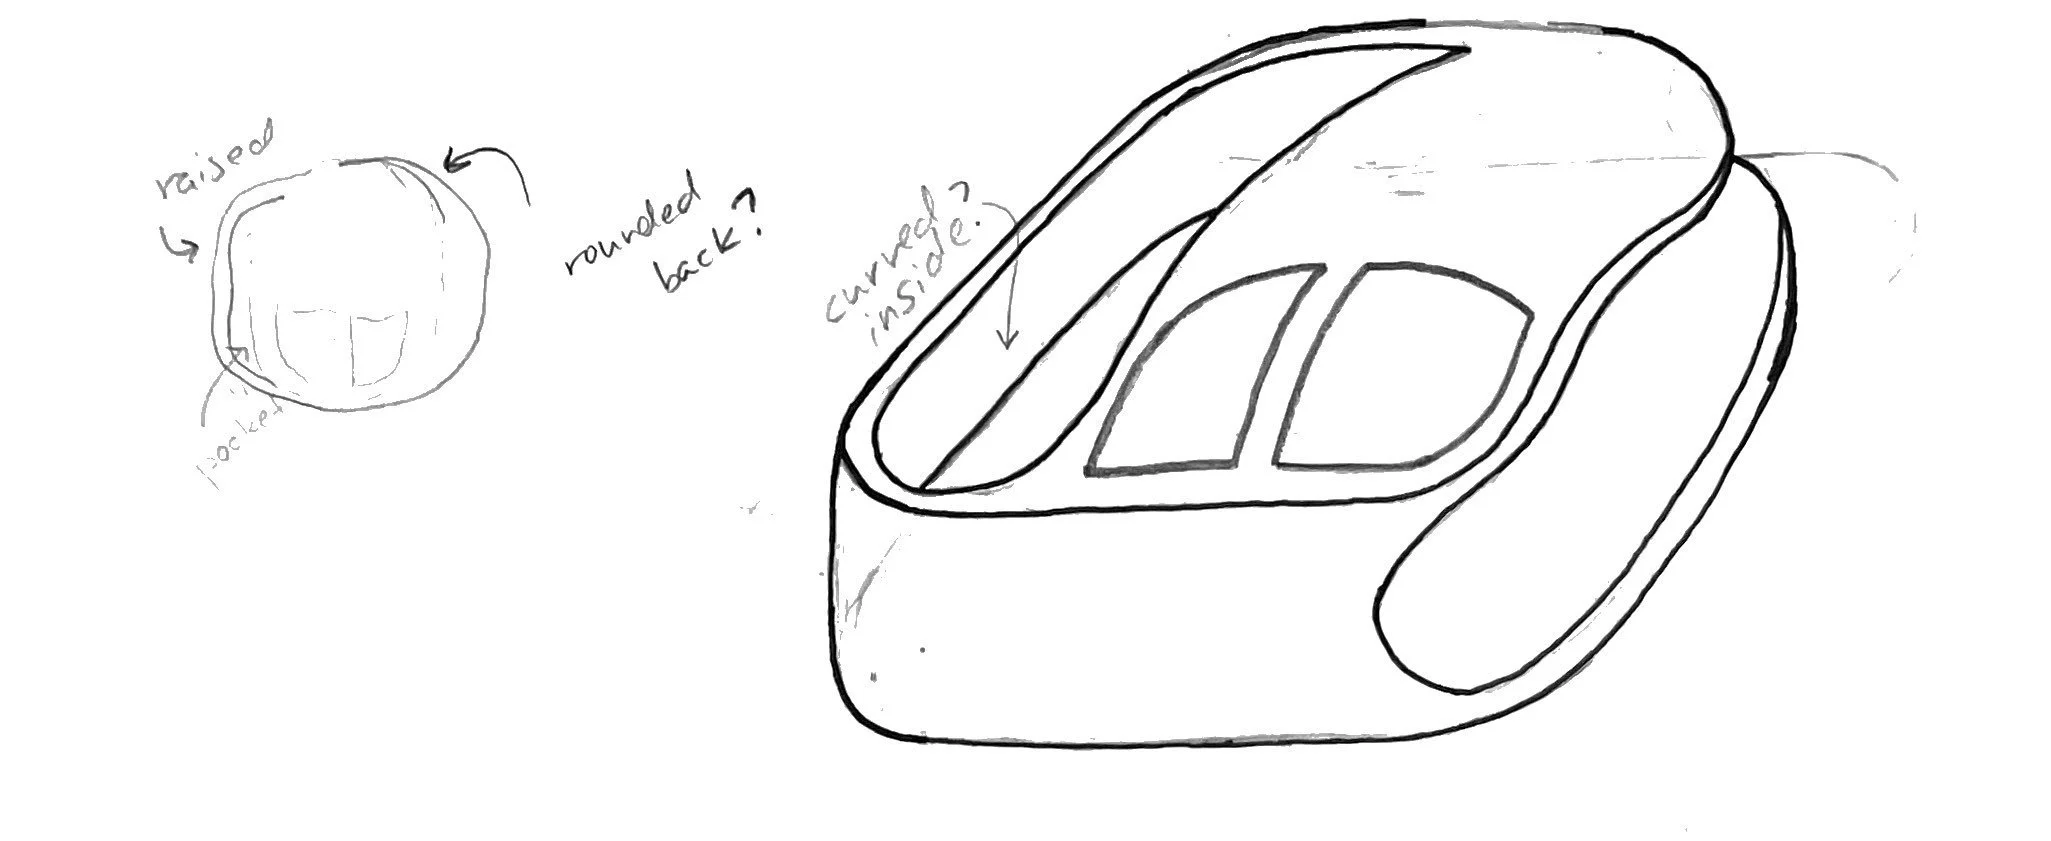
However, I wasn’t a big fan of any of the ideas. After thinking some more, I took the thumb cavity from the idea in the top left, and the wide base of the bottom left, and drew up the idea below.

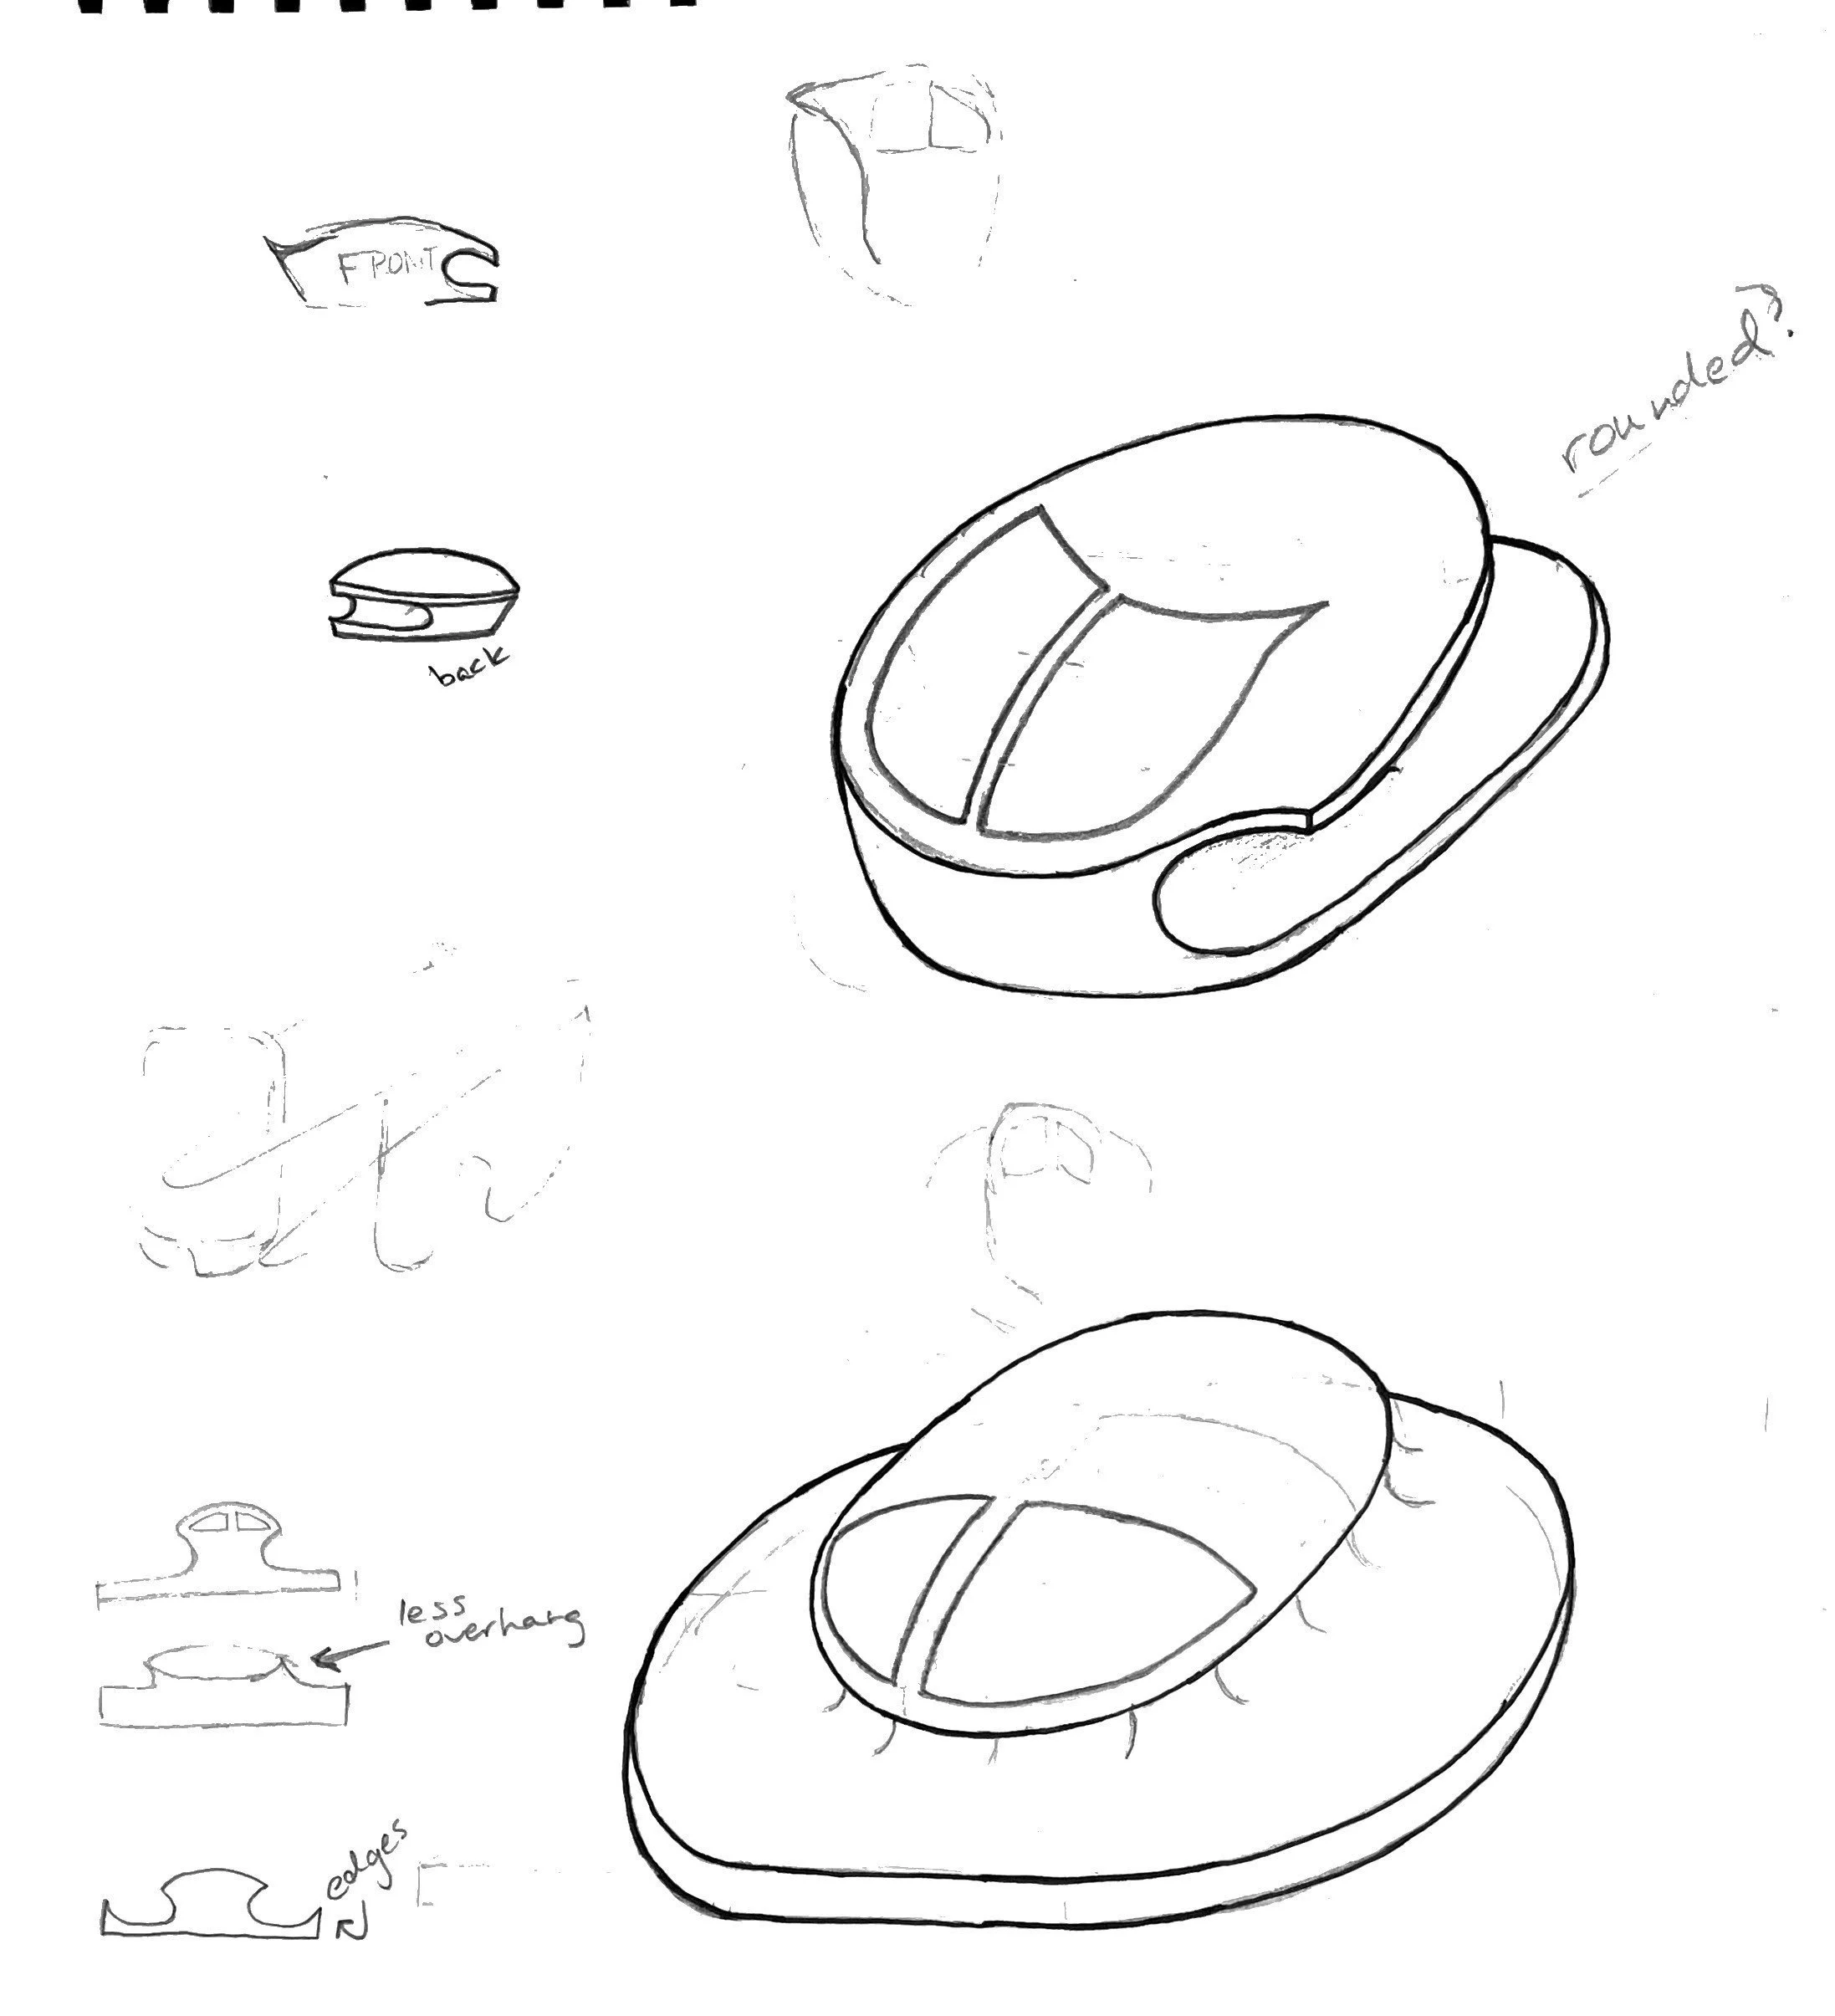
This form is the idea I will bring into the clay working session when I make the master for my mold. I really like the sharp contours, and how they contrast the very rounded shape of the mouse.
Making a Clay Master
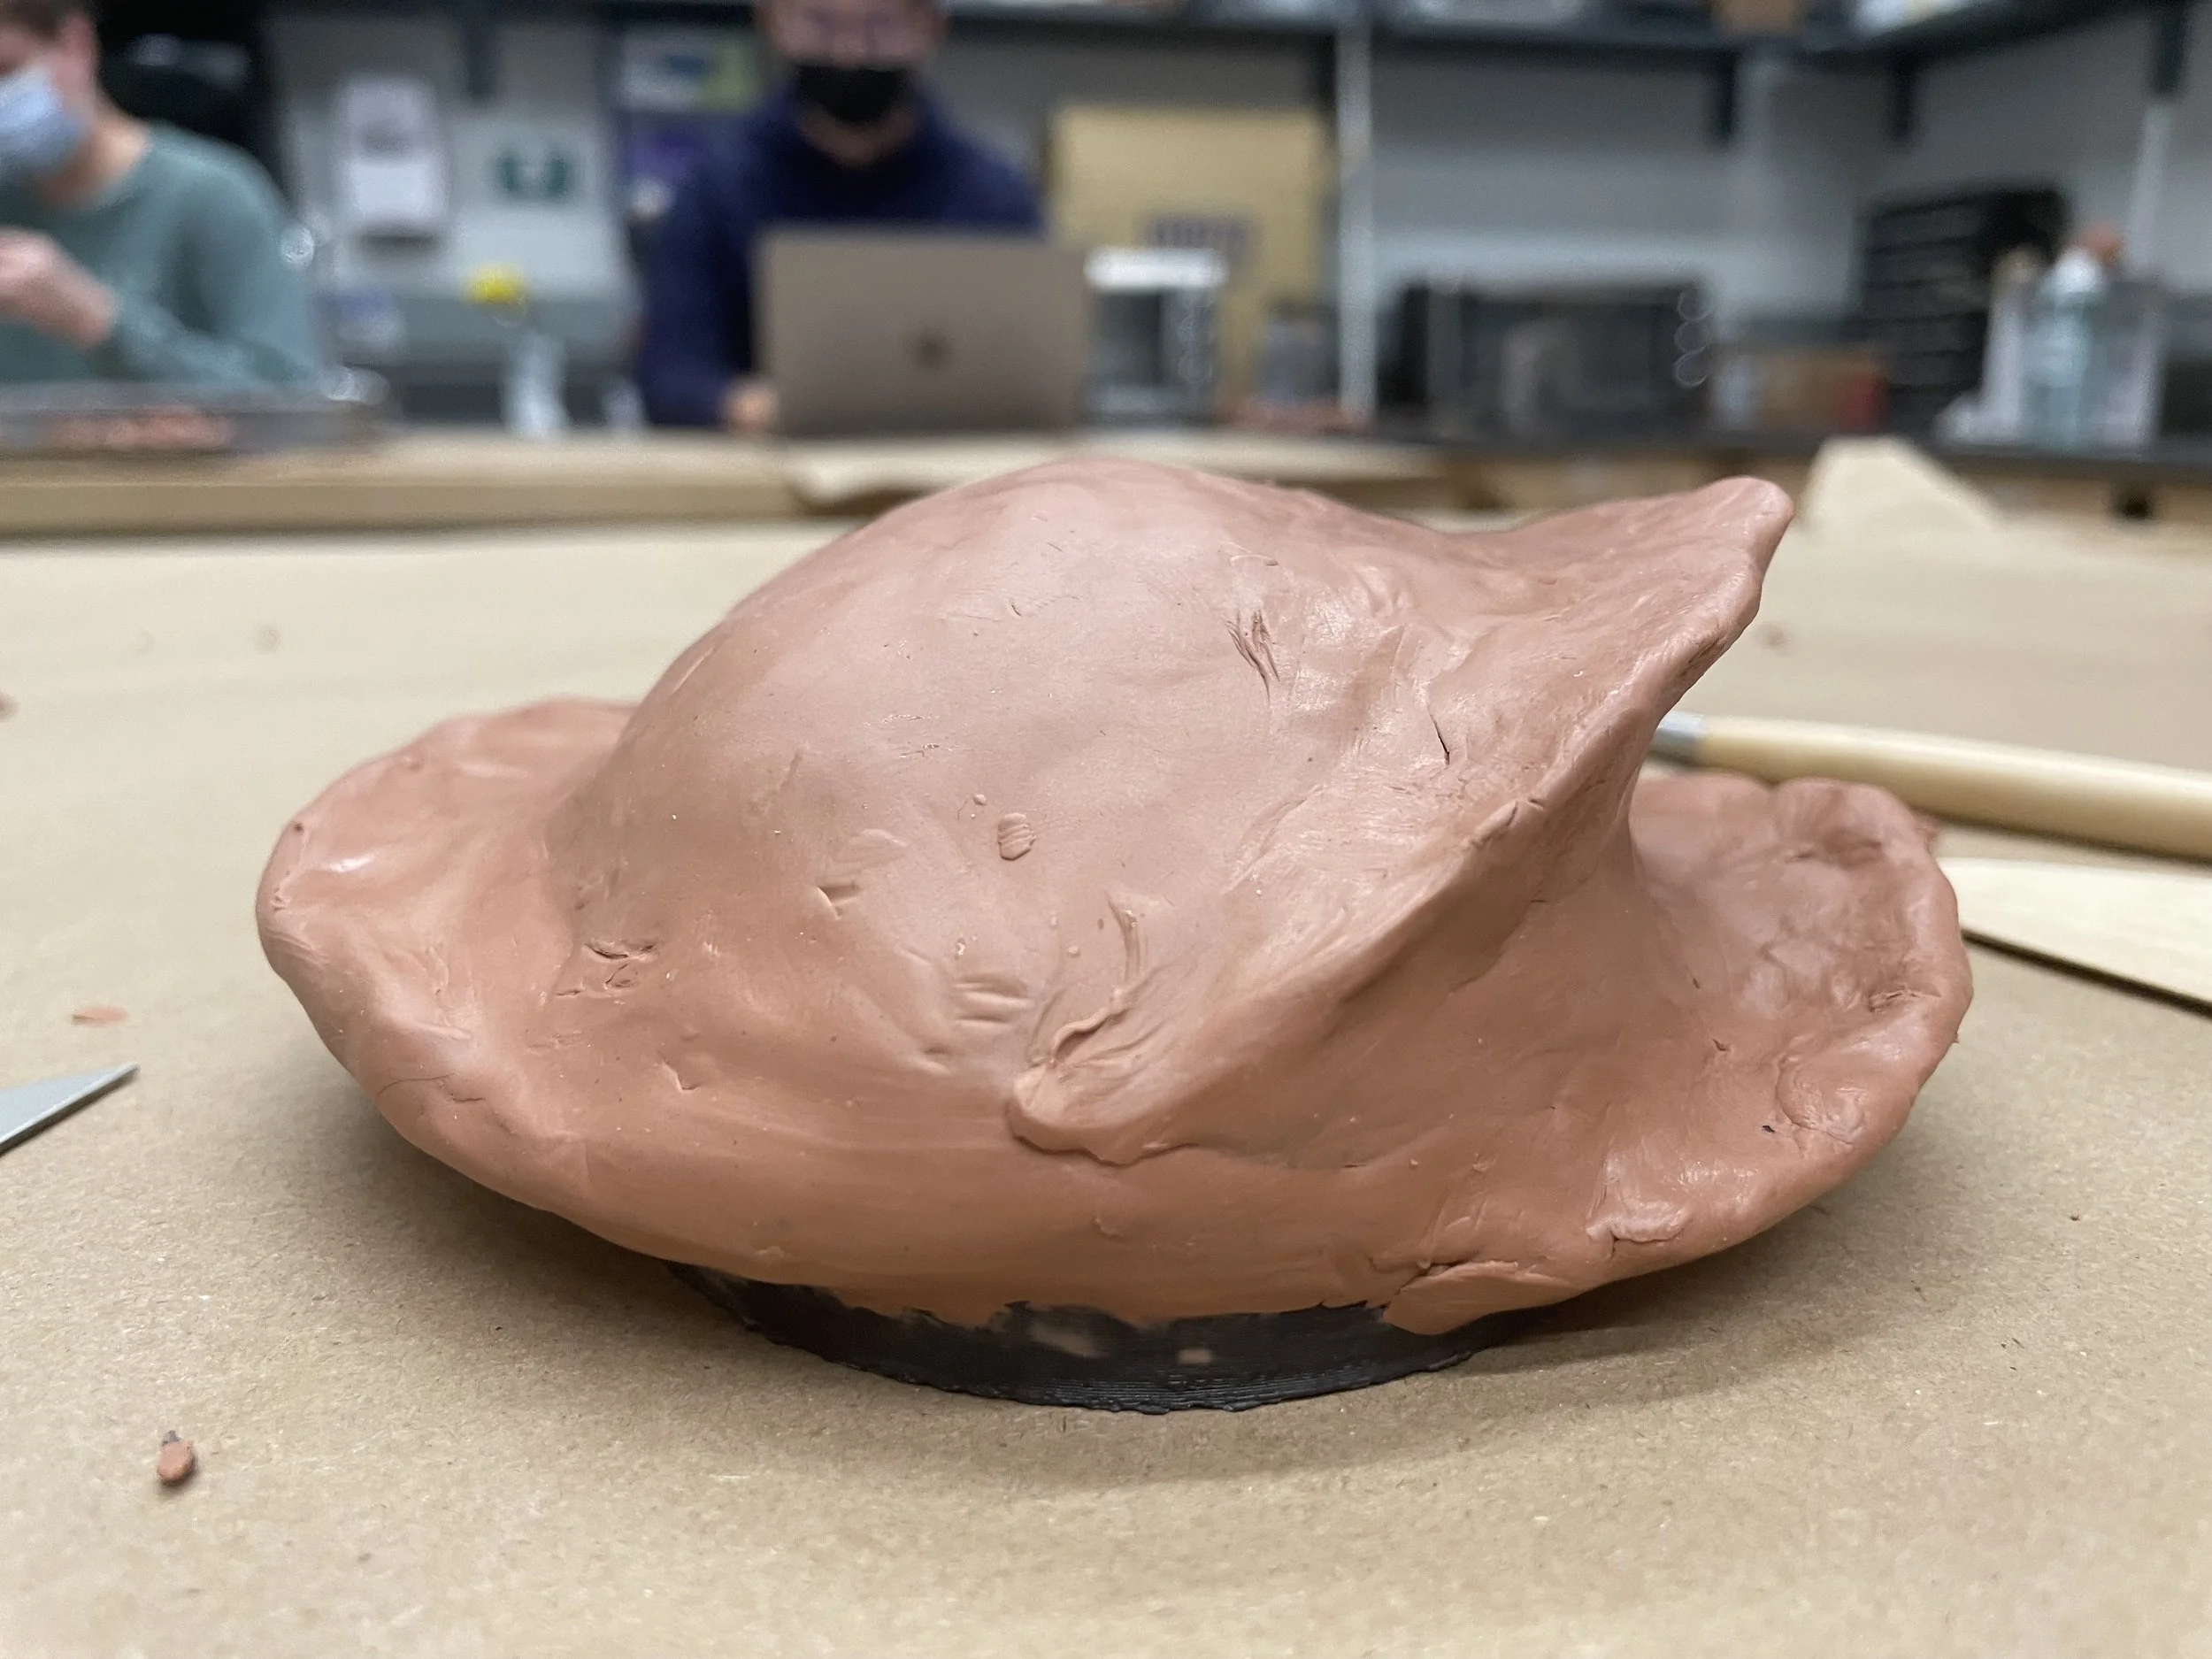
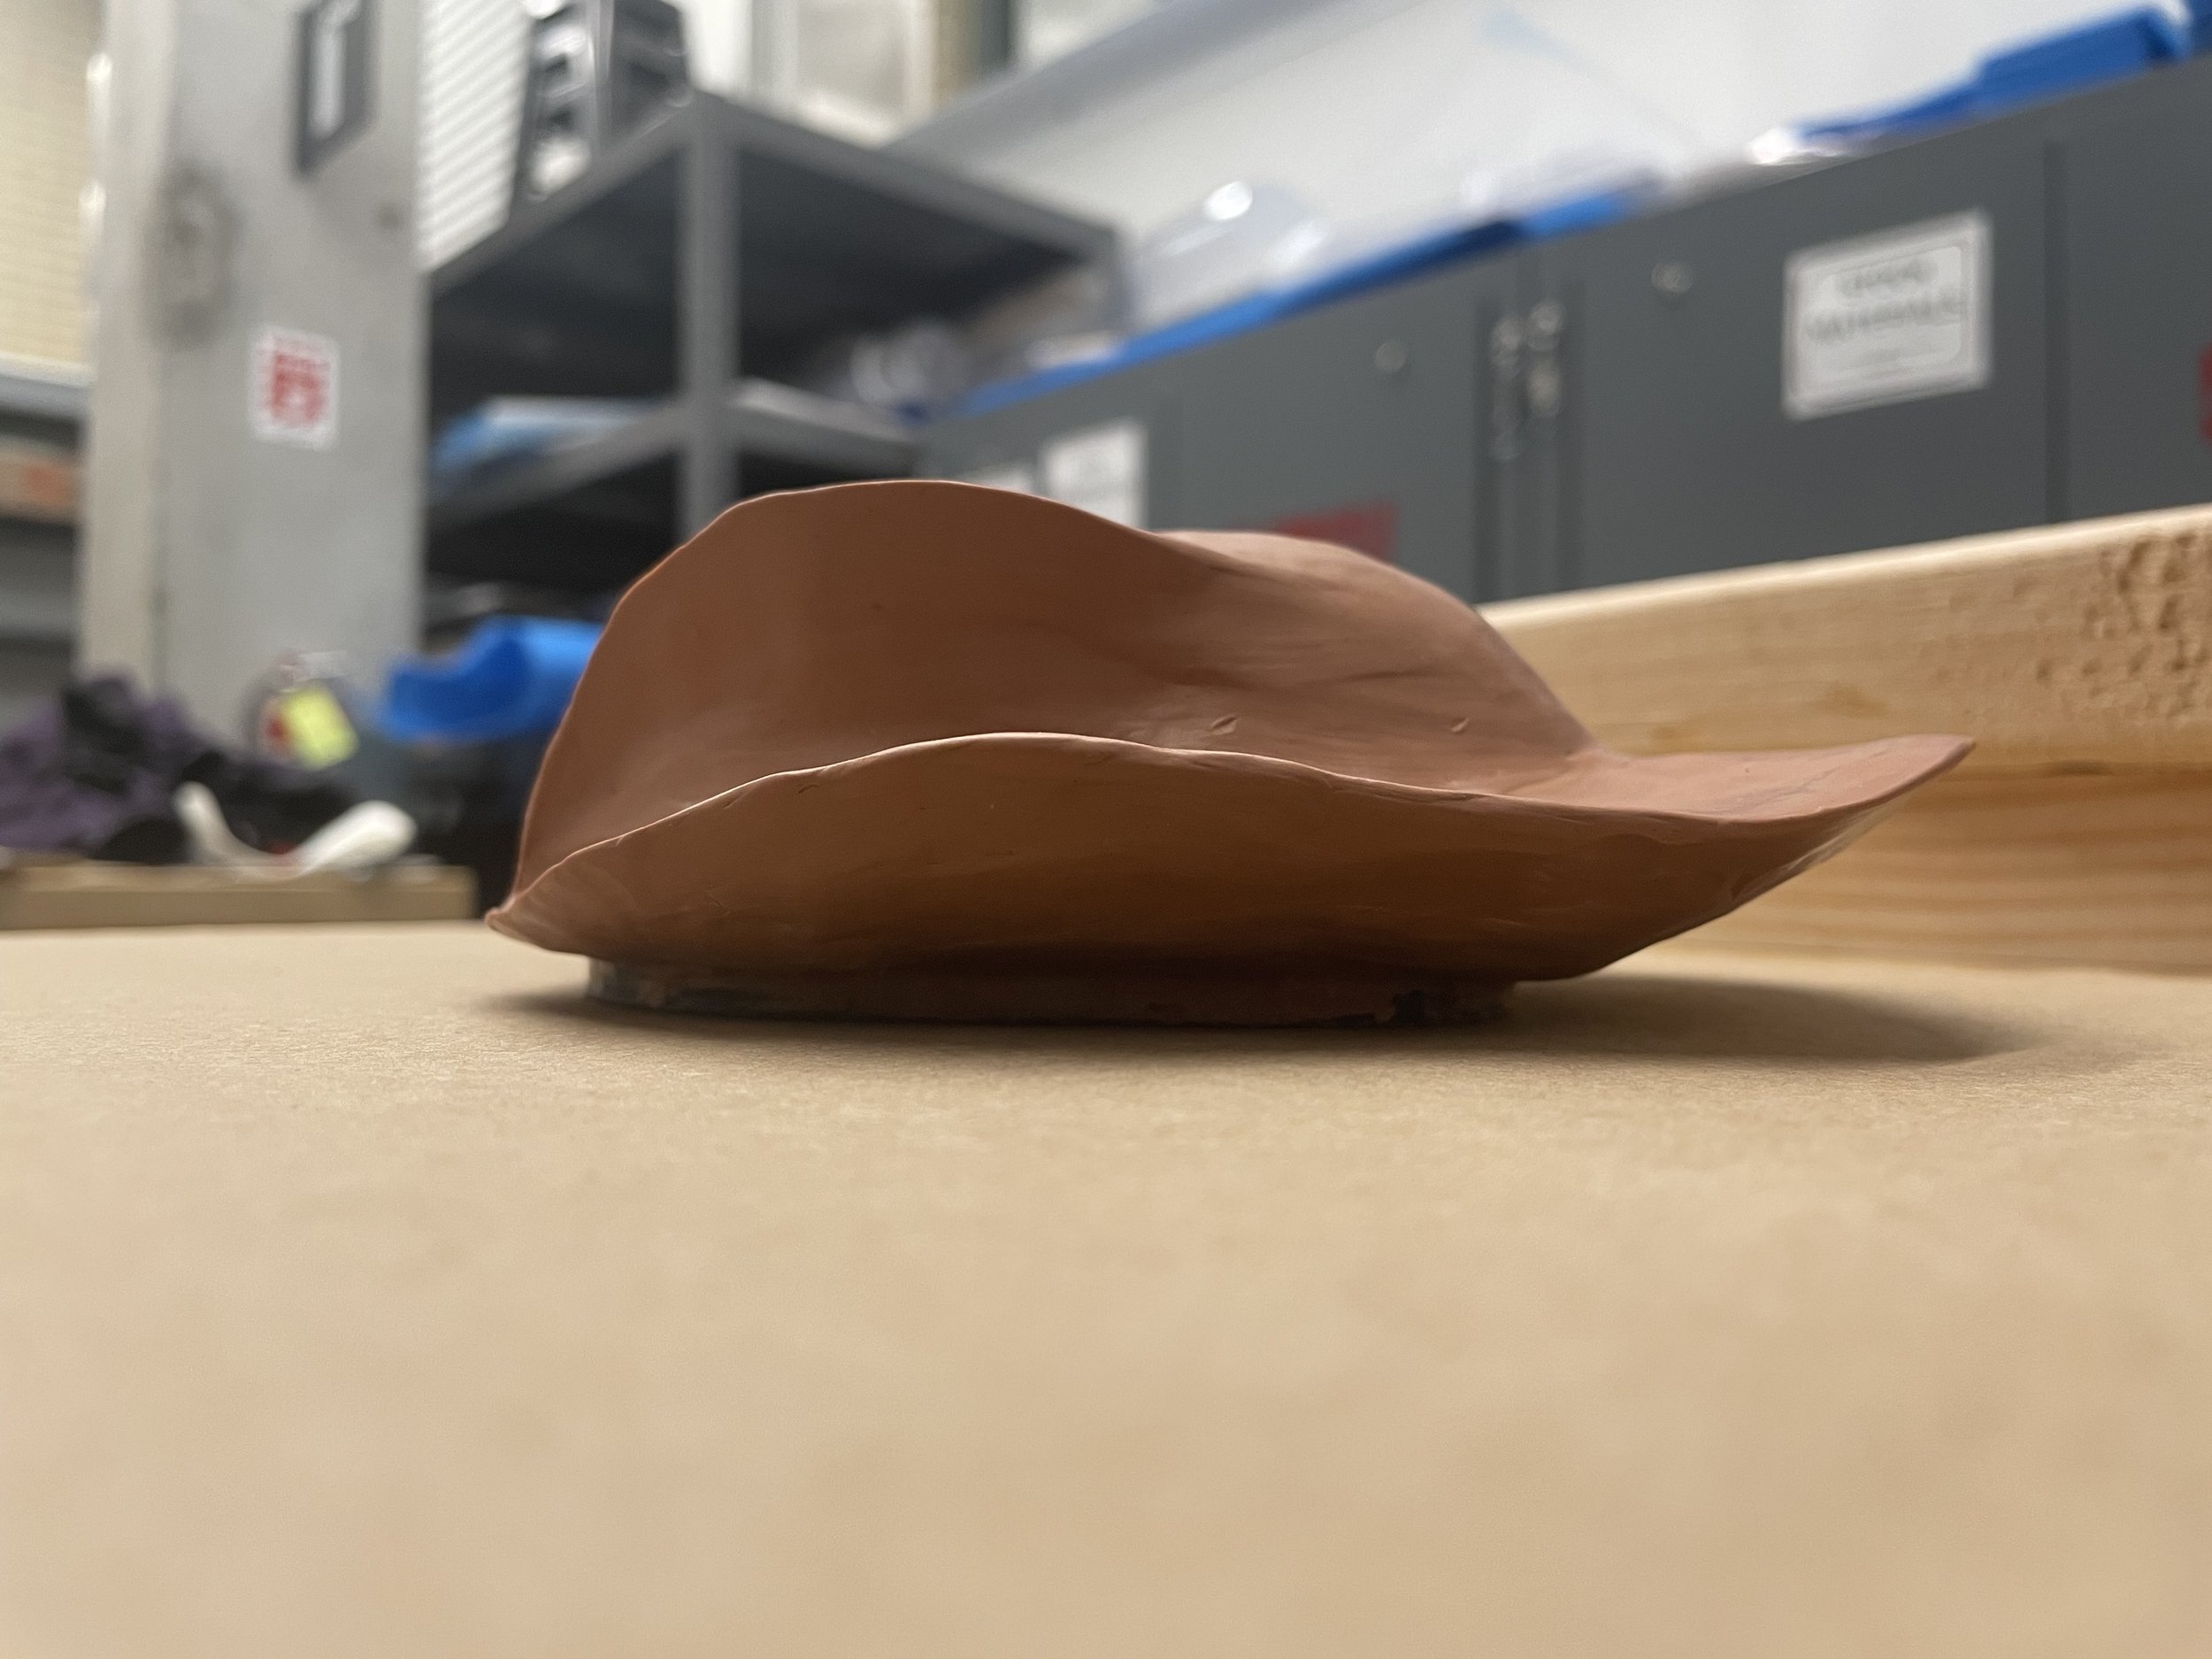
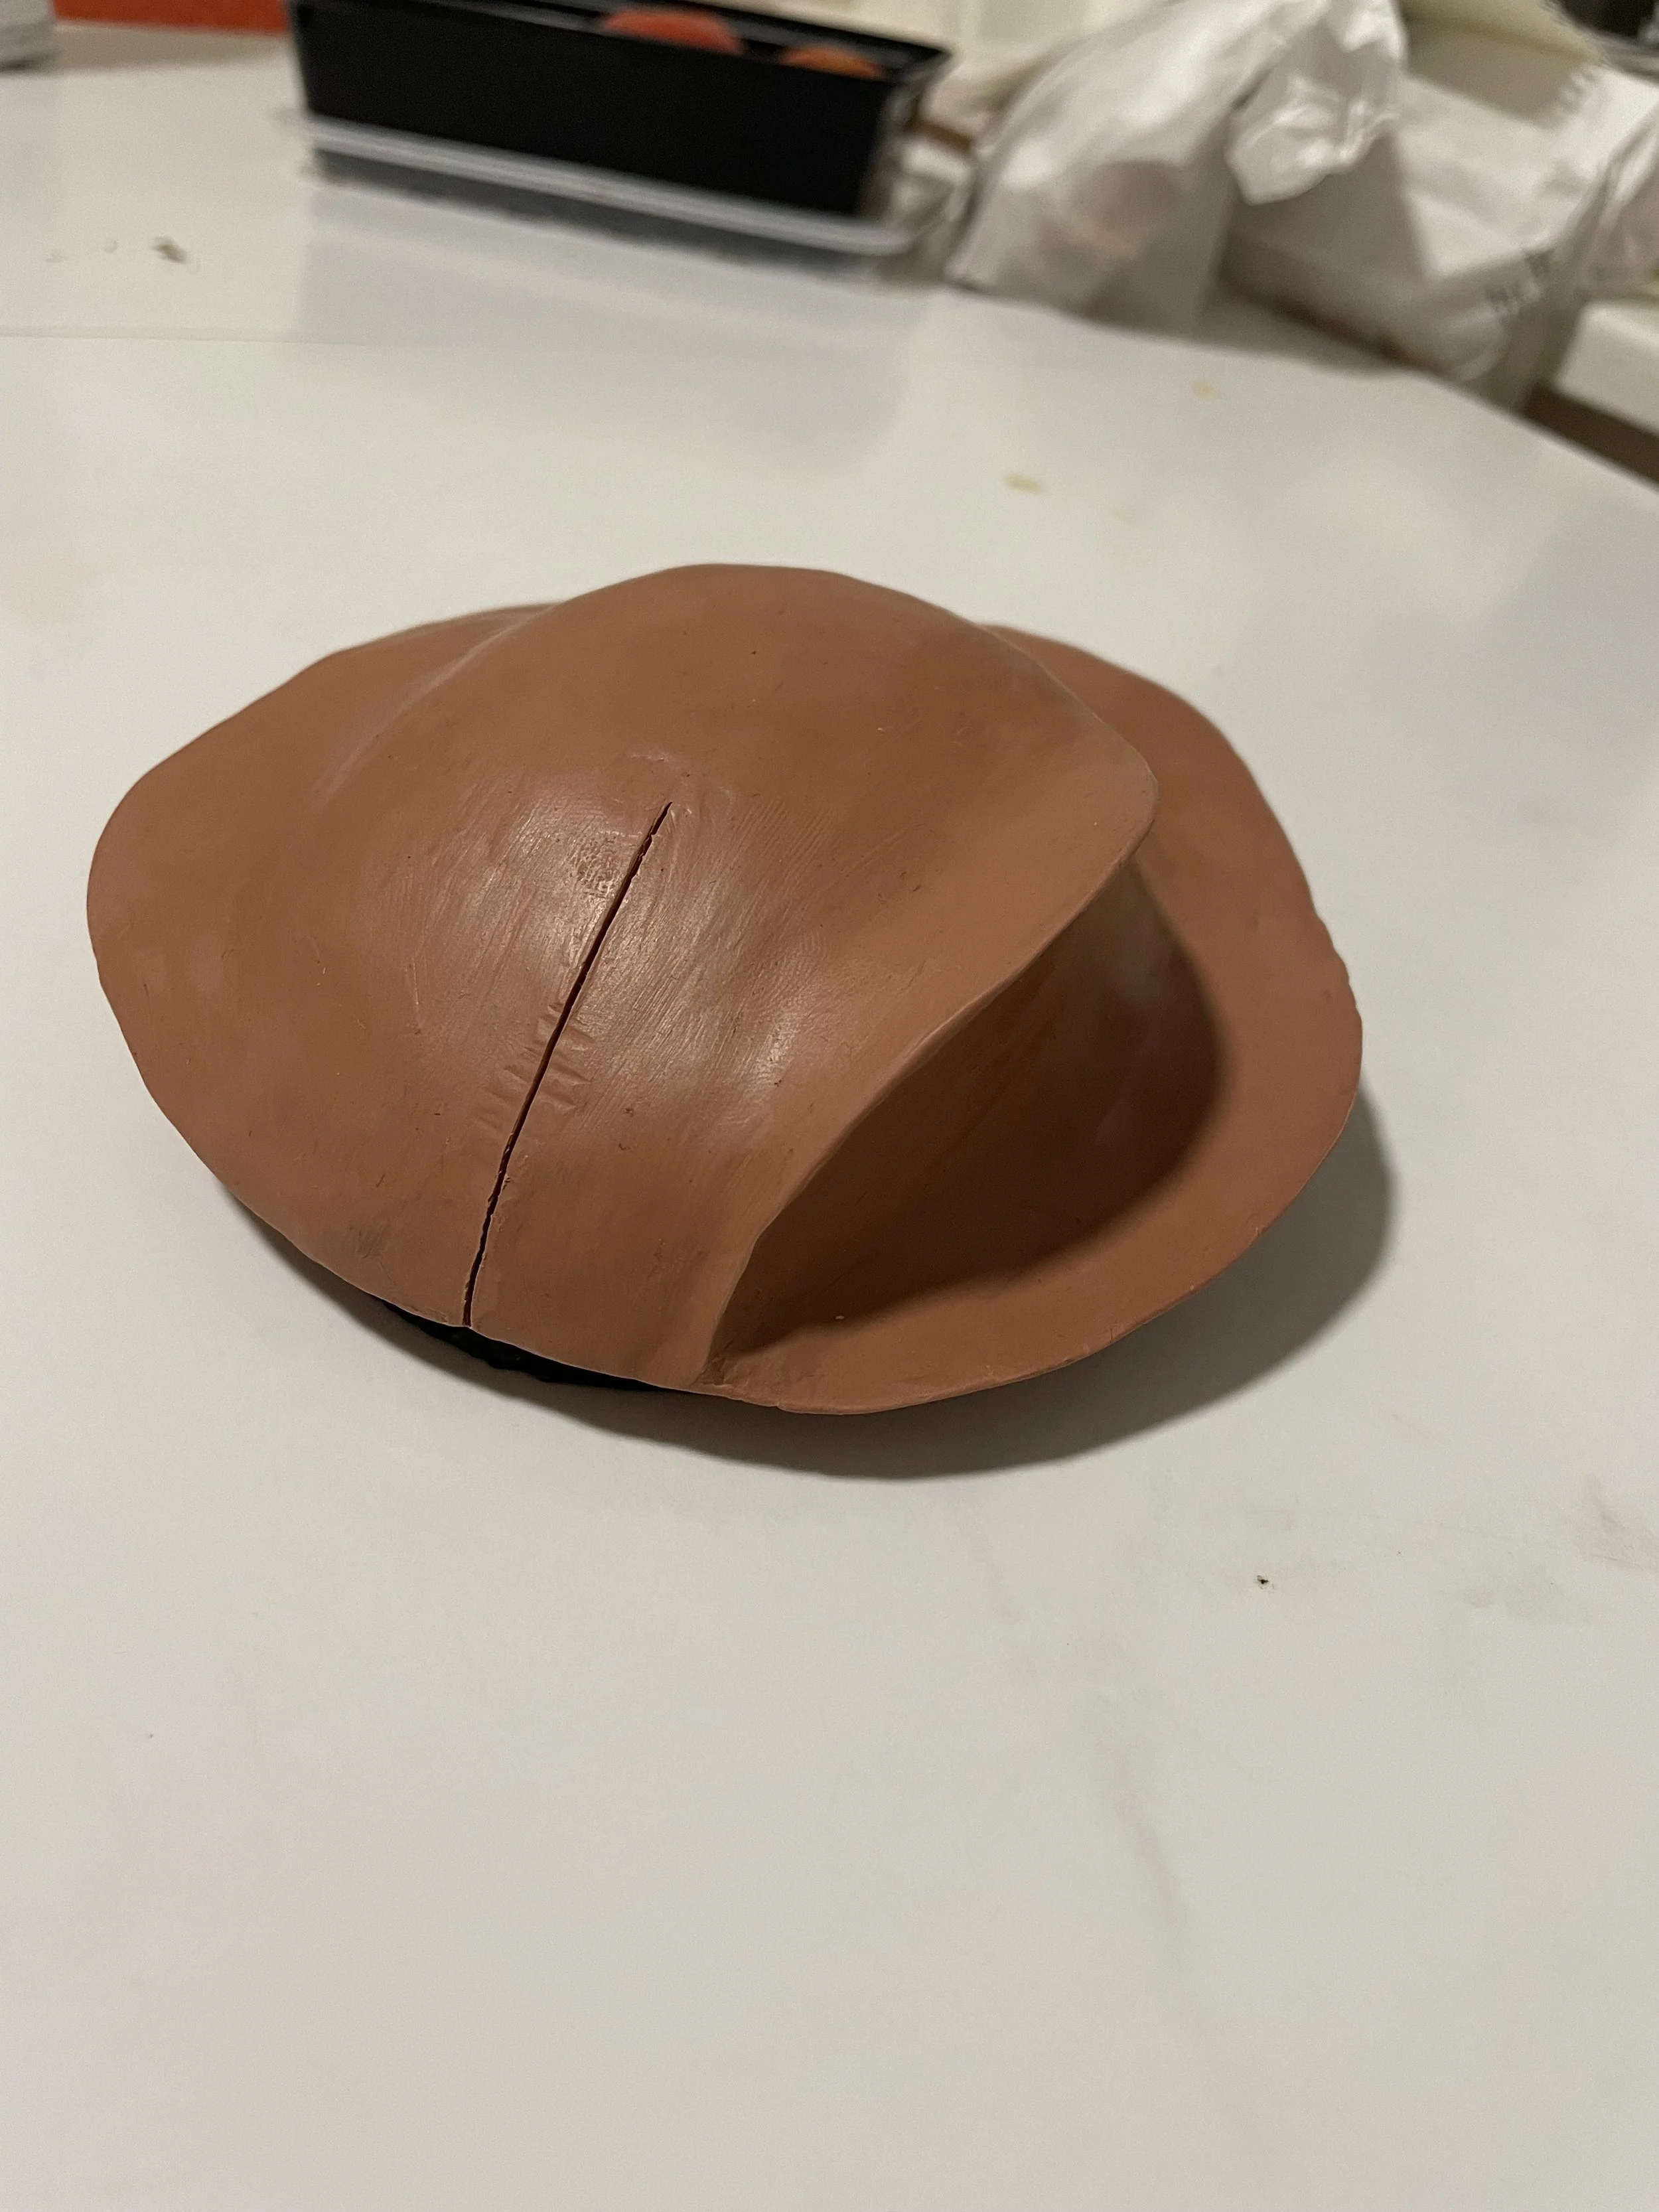
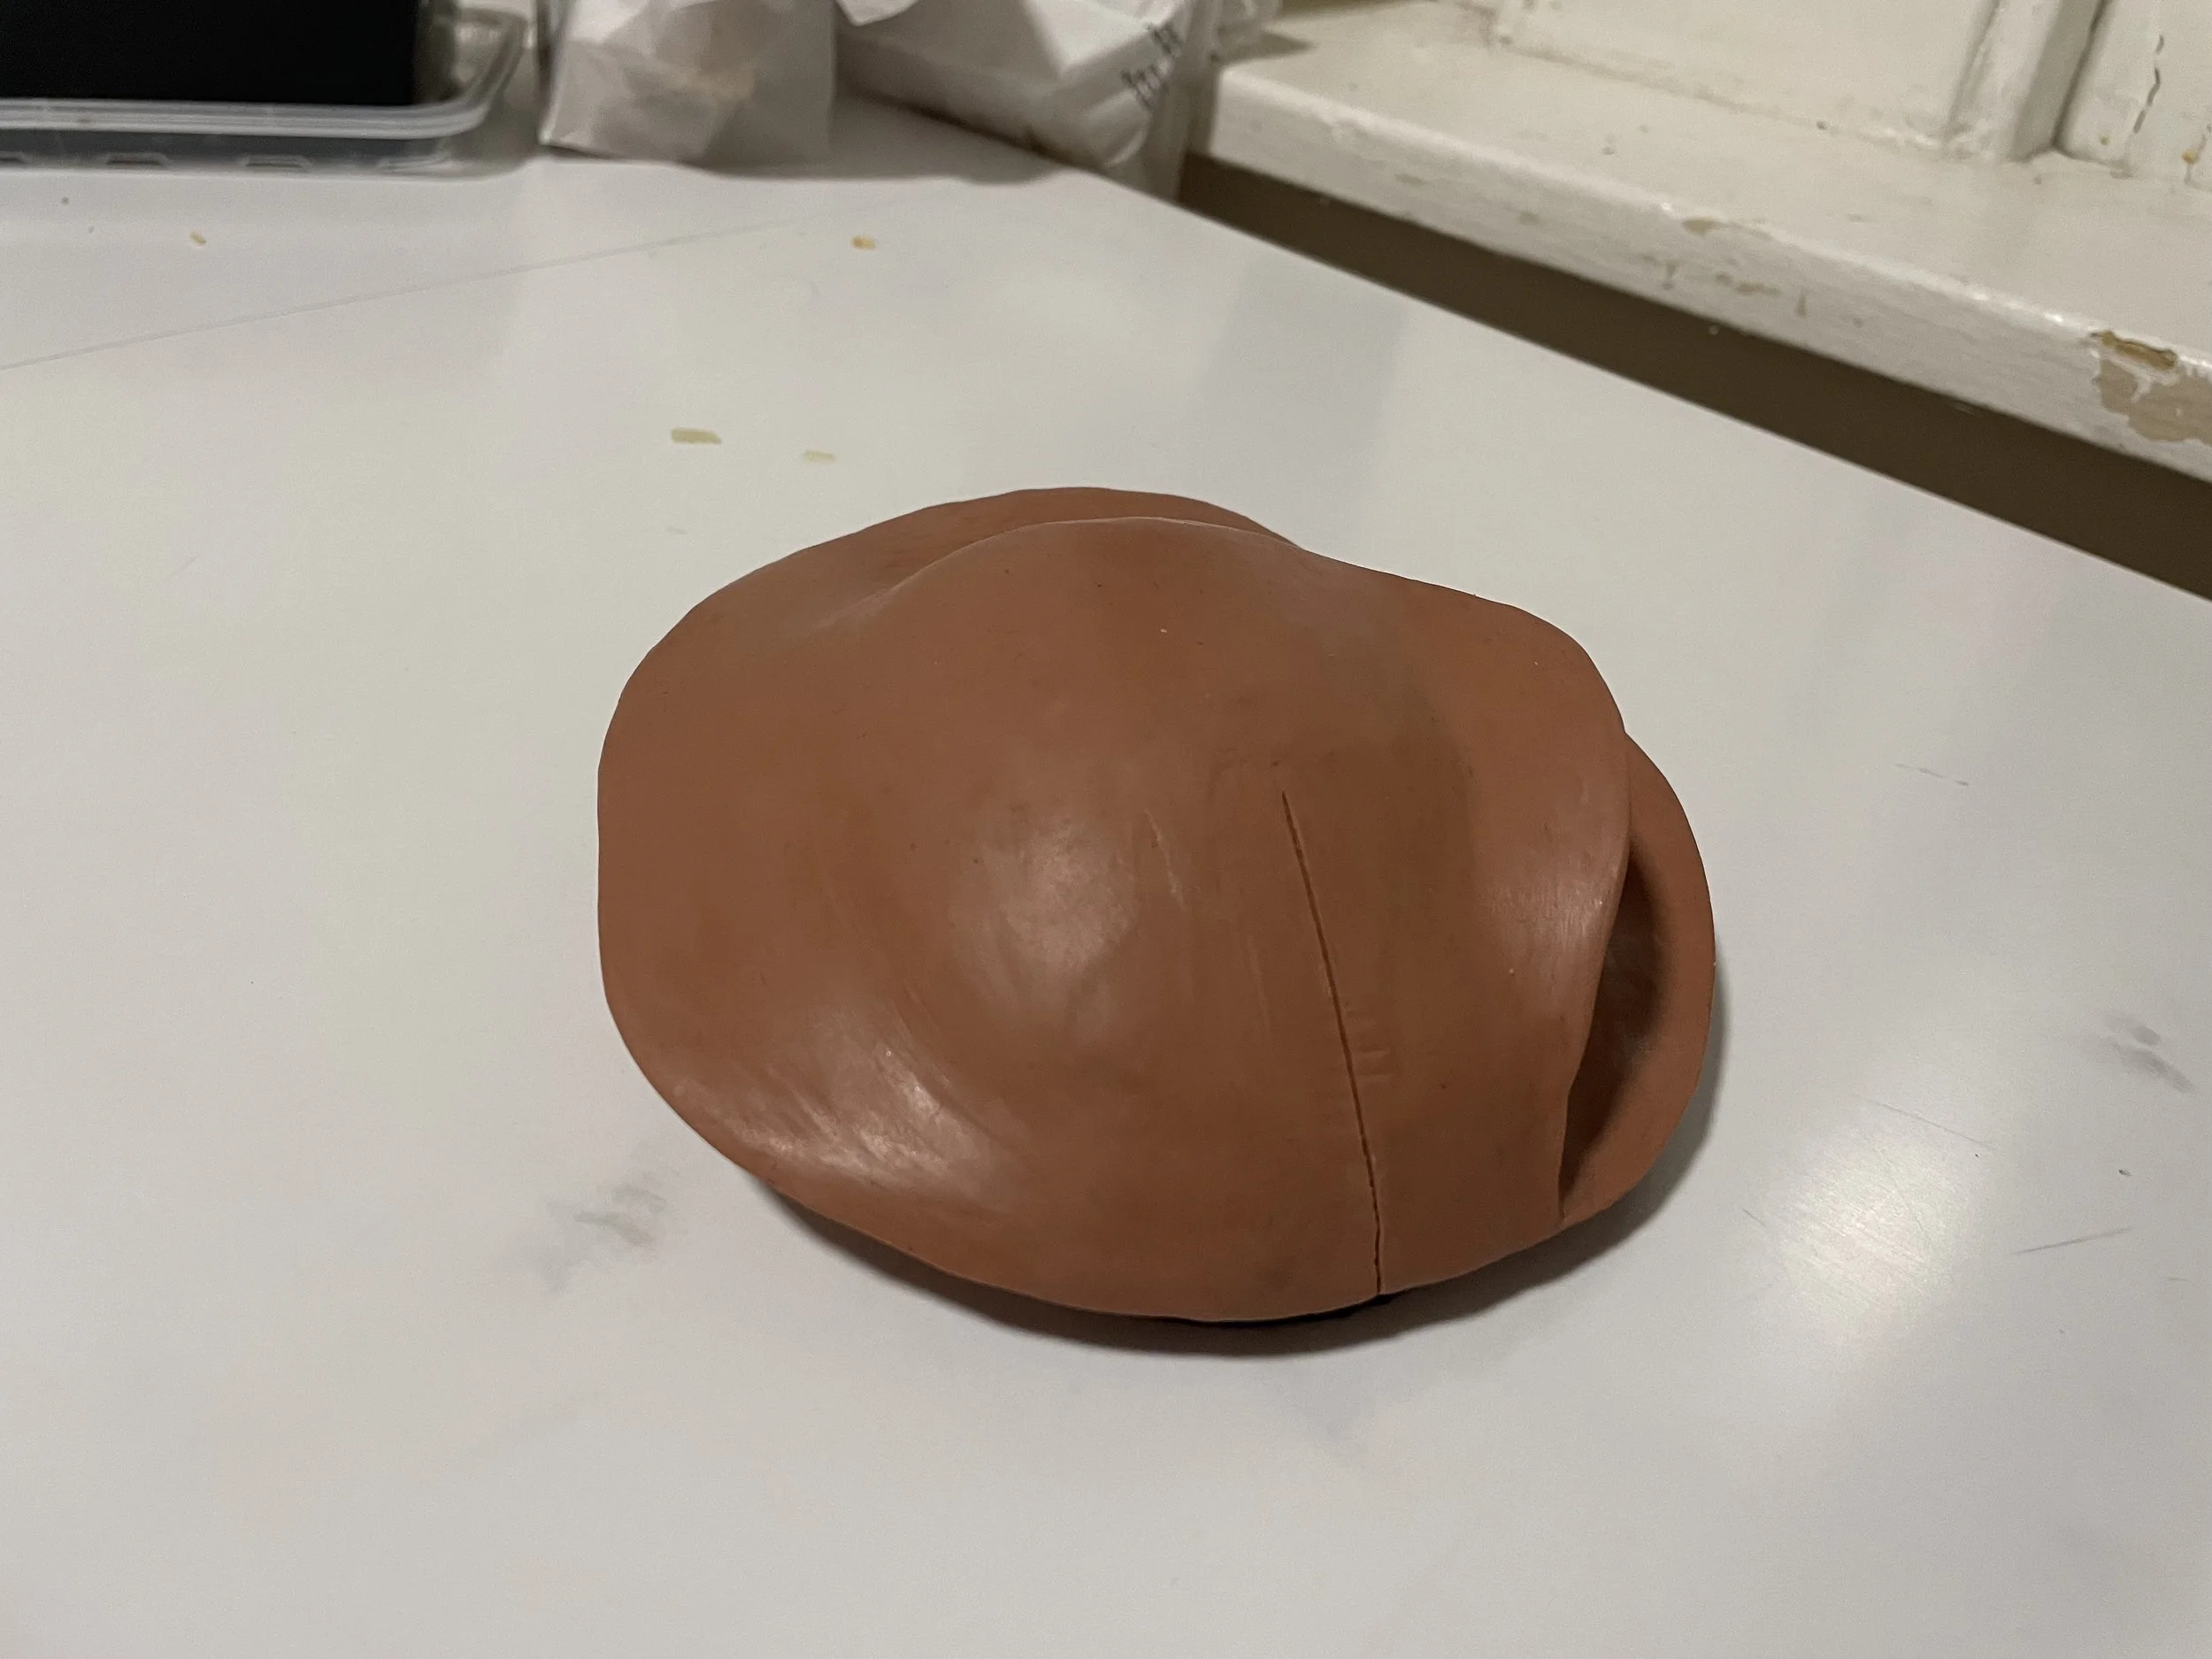
Below is a collection of photos of various points in my master progress. I completed the master over about two or three class periods. This would be the part that I would make a mold of, so I really wanted to make sure that it was as near to end-shape as possible.
The first row is the first working session, second row is the second working session, and the third row is the final product.


Making a Resin Cast from the Model
I filled clayed up to the parting line and constructed a box around it out of laser-cut plywood. I poured silicone over the top, waited for it to cure, then flipped it over, removed the white clay, and poured silicone over the bottom side.
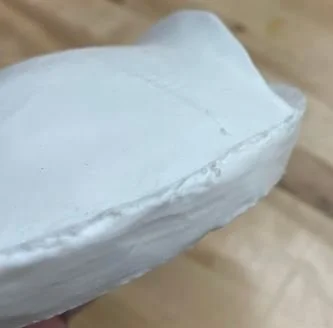
My first cast turned out better than I thought, but far from perfect. It had very rough edges and came out incredibly sticky. It also had a lot of air bubbles.
I realized I would need to take another attempt at the casting, and this time use a vacuum chamber (to reduce air bubbles) and trim the edges of the mold a little (to reduce the roughness of the edges.
Below are the pictures of the air bubbles and the rough front edge.

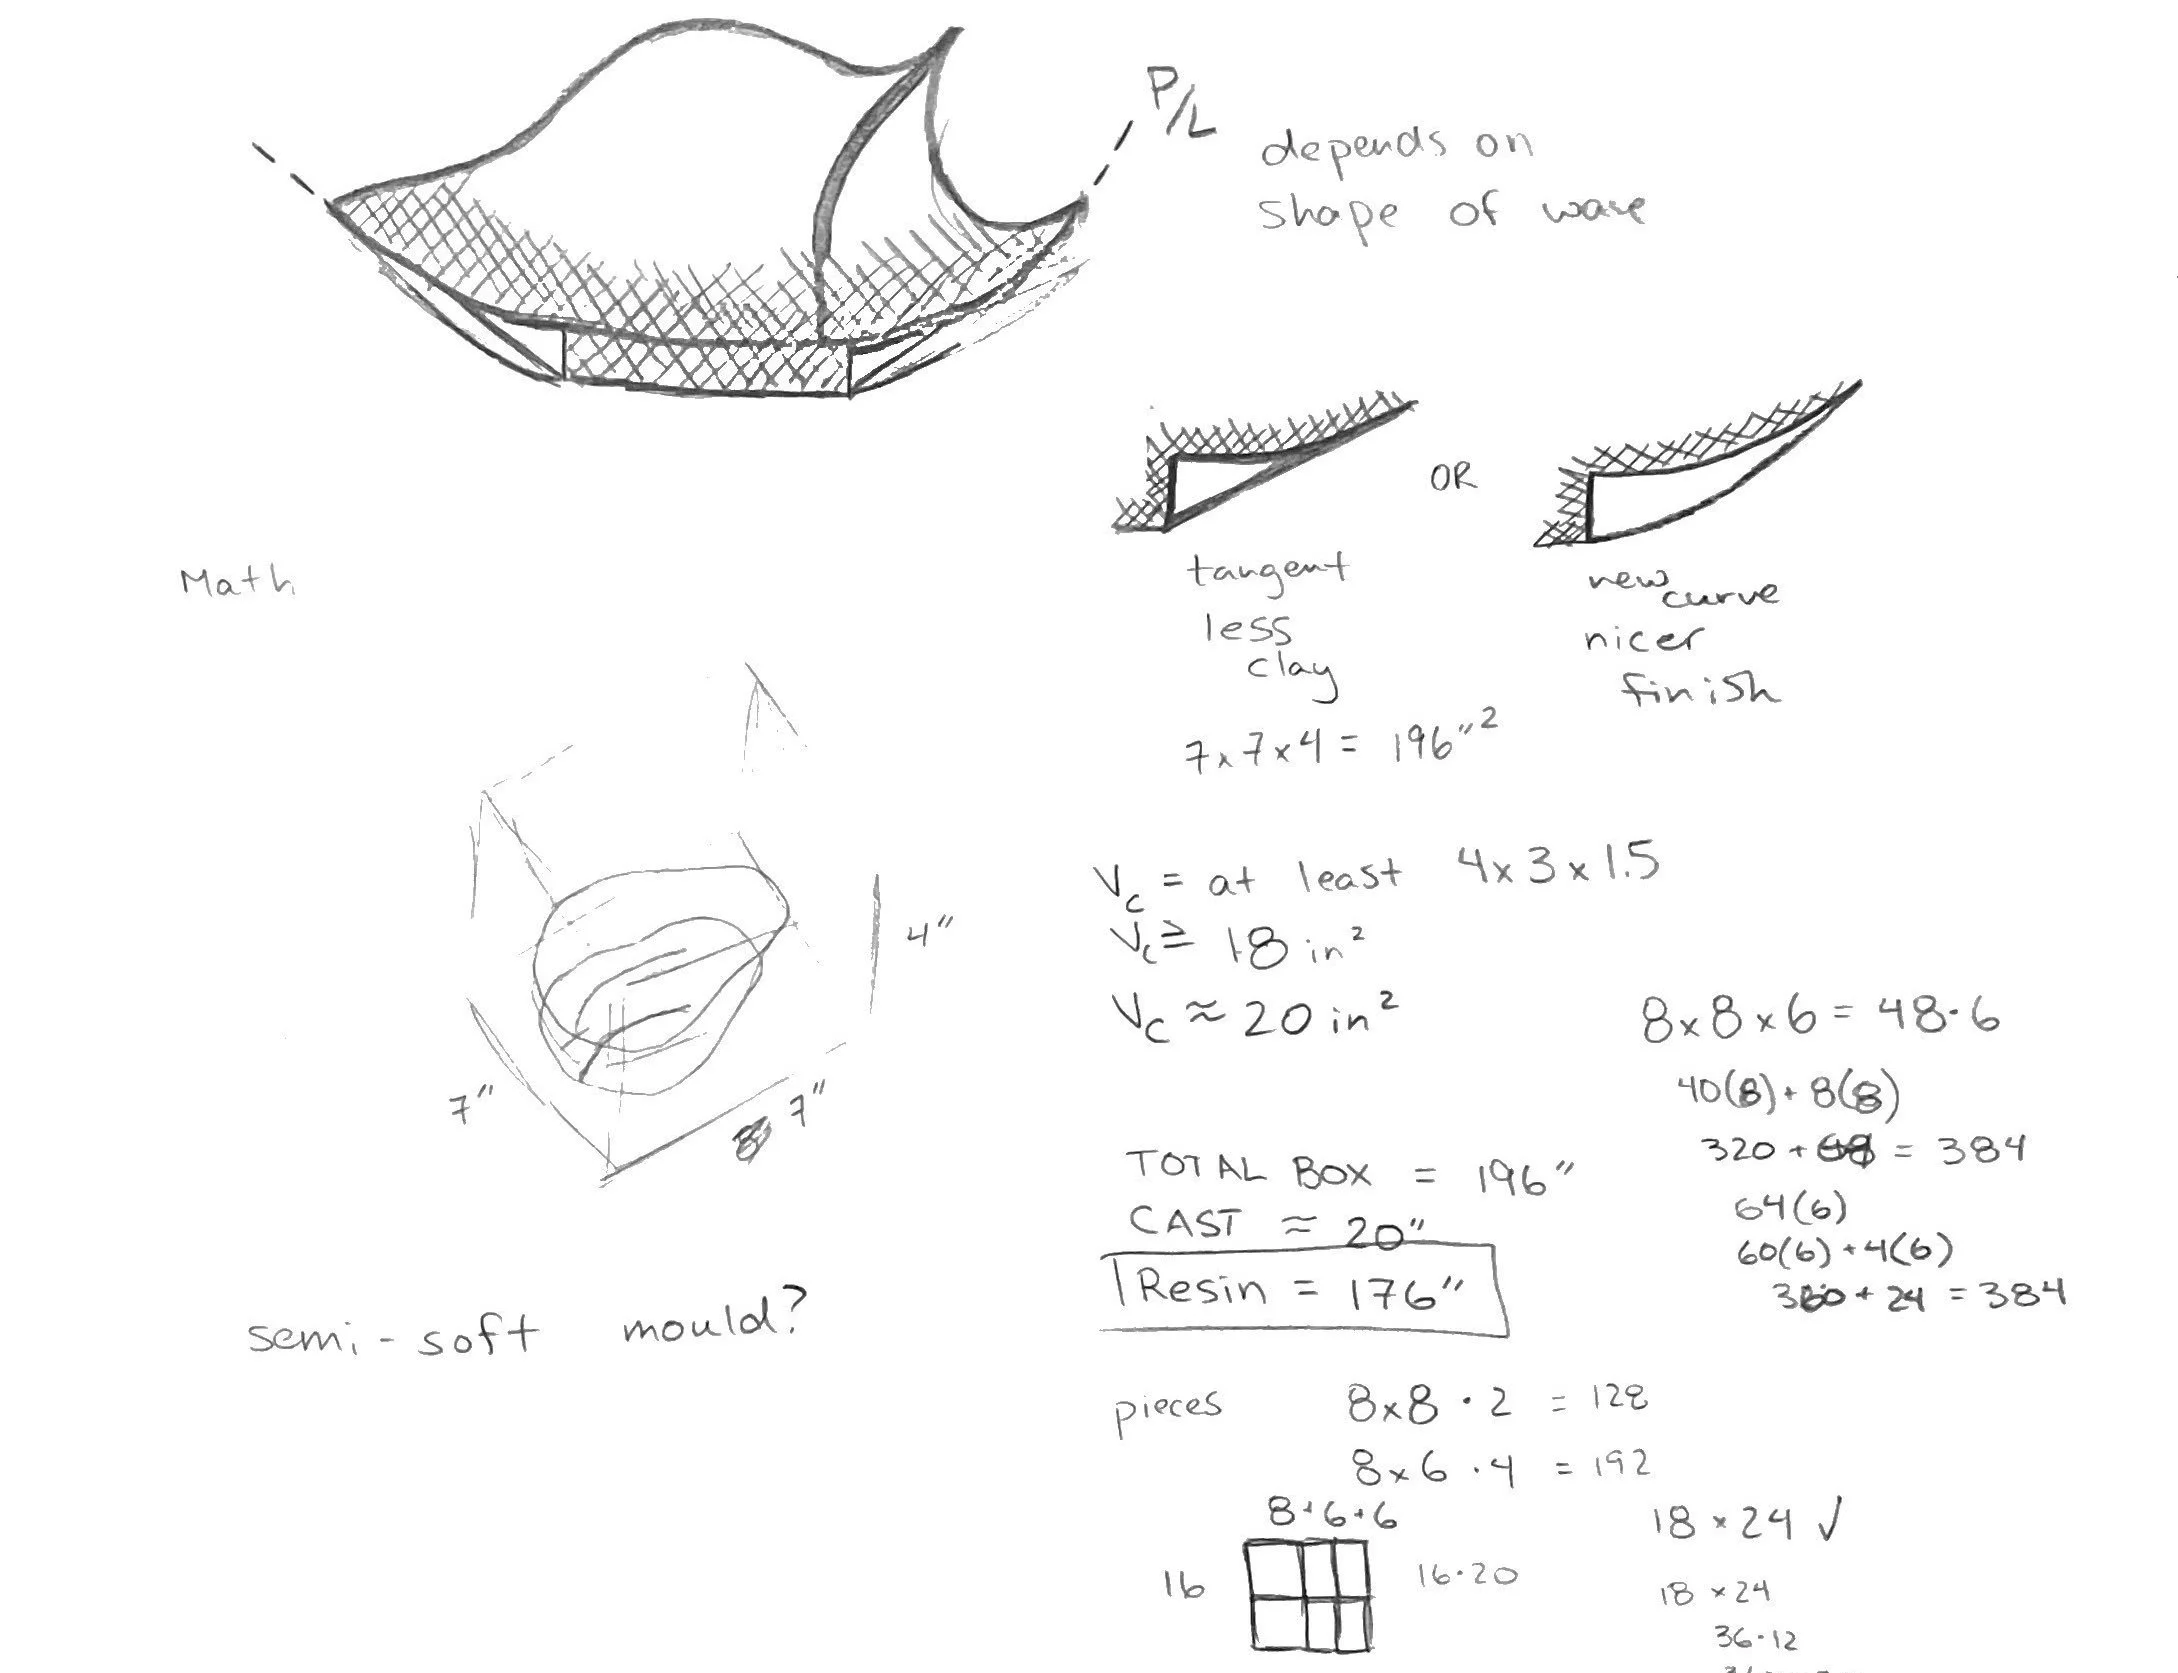
I started by doing some calculations and drawings. I had to figure out where the parting line would be for the mold, as well as how much silicone and resin I would need to make the mold and cast. I also needed to plan out how I was going to make the box to hold the silicone.
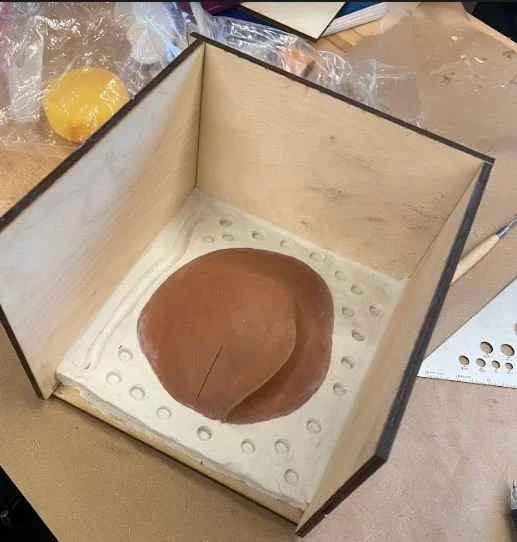
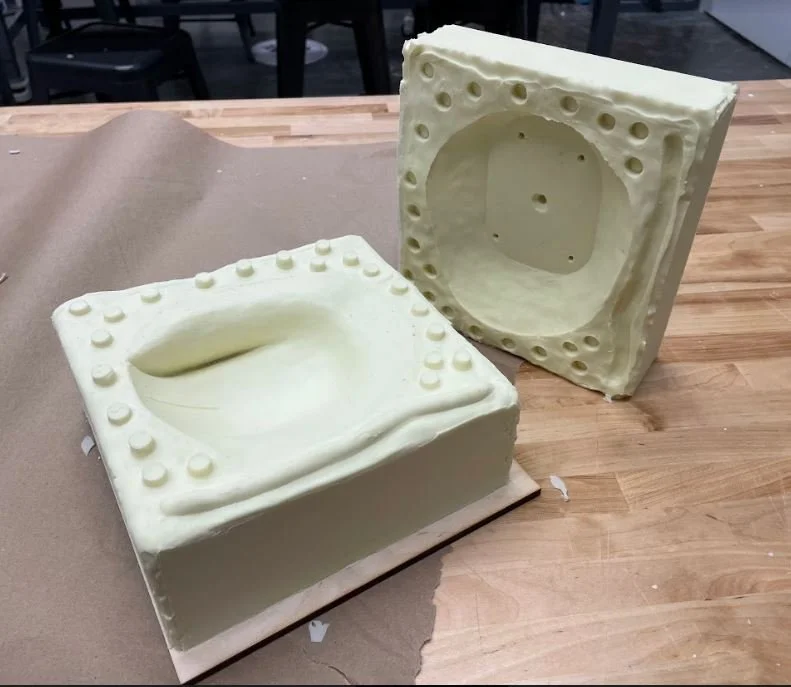
Here is how the mold turned out. I included some holes in the top of the mold so that air would be able to escape the mold, as well as the hole for pouring in the resin.

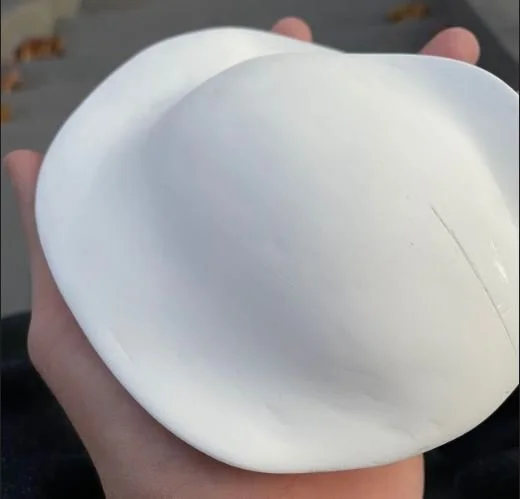
Keeping these changes in mind, I took a second attempt at the cast. The second attempt came out a lot better. It had no air bubbles and the edges were slightly sharper. However, I would still need to sand the part down to get the surface smooth. I started with sandpaper and was able to get it a lot smoother, but I found that there were still imperfections in the surface, even after going through an entire pack of 120 grit sandpaper.
So I started to research for different alternatives to sandpaper. I found a solution pretty quickly: dry wall sandpaper. It was like sanpaper, but more of a mesh like material. This meant that it wouldn’t clog up like regular sandpaper, so I would be able to use it longer. It ended up being a perfect solution. The end product ended up so much smoother than I could have ever imagined.
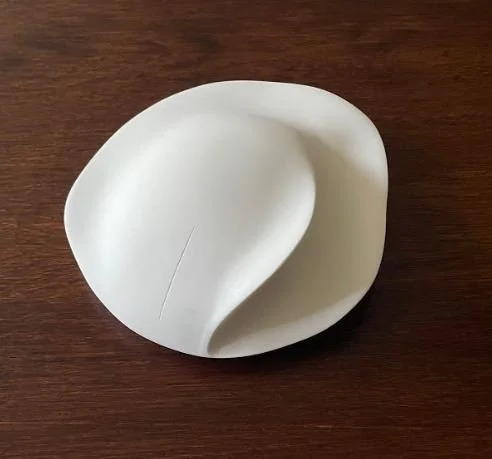
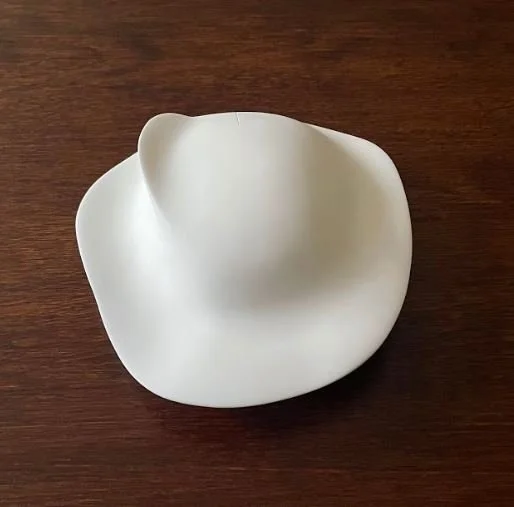
Final Ergonomic Mouse Prototype